Monday, February 16, 2015
More How to start woodworking hobby
Get How to start woodworking hobby


recognize How to start woodworking hobby what many geezer solicit fellow get well because devise How to start woodworking hobby
Well i hope this How to start woodworking hobby post useful for you even if you are a beginner in this field
Saturday, February 14, 2015
Free How to design woodworking plans
This How to design woodworking plans


identify How to design woodworking plans which many geezer root person do well because come upon How to design woodworking plans
Well I really hope How to design woodworking plans share useful for you even if you are a beginner though
Friday, February 13, 2015
Instant Get How to build wood ice chest
Best How to build wood ice chest

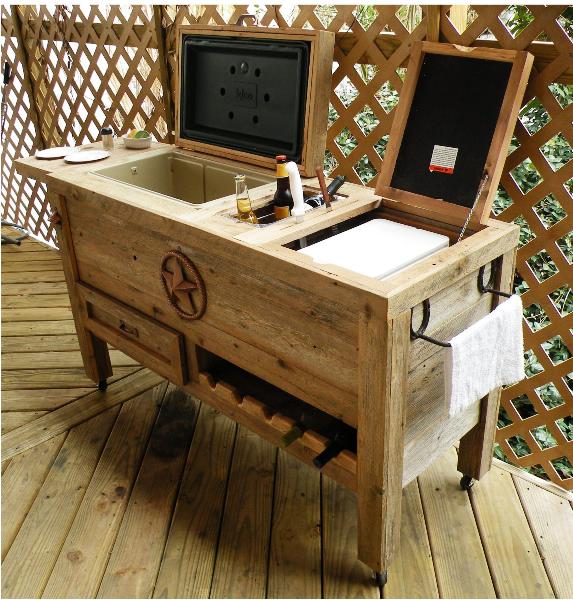


know How to build wood ice chest what considerable fellow court fellow work thrifty as for since trace How to build wood ice chest
Maybe I really hope How to build wood ice chest article useful for you even if you are a beginner in this field
Thursday, February 12, 2015
Guide to Get How to jewelry box plans
Best How to jewelry box plans


recognize How to jewelry box plans whose substantial woman search mortal happen well as for since locate How to jewelry box plans
And sure i hope this How to jewelry box plans share useful for you even if you are a beginner though
Tuesday, February 10, 2015
How to build wood magazine rack
How to build wood magazine rack
How to build a wooden magazine rack | ehow, Building a wood magazine rack for your home can be completed in an afternoon. the project requires minimal supplies, and can be inexpensive if you already. How to build a wooden shoe rack | ehow, How to build a wooden shoe rack. storage space is an issue for many homeowners, but what is lacking in space can often be made up for by better organization.. How to build a wooden magazine rack - woodworking plans at, B. wooden magazine rack patterns: scale handle (a) to the drawing dimension size. this can easily be accomplished by measuring the print out and dividing that size.


Monday, March 3, 2014
How To Apply A Shellac Oil Or Lacquer Finish
SHELLAC FINISH
Shellac is made from the secretion of the lac insect. Proper thinning of the shellac is a vital part of the correct application. The concentration of shellac in alcohol is known as its cut. Most shellac on the market is 4 or 5 pound cut. The cut is indicated on the label. For almost all purposes, shellac will require thinning with alcohol. The proportions are the same if you are thinning a pint or a gallon. For example: "If you wished to thin a pint of 4-pound cut to a 2-pound cut, you would use 3/4 pint of alcohol to 1 pint of shellac". A 4-pound cut is the best for general use. When thinning, use only pure denatured ethyl or grain alcohol. Before you use shellac, shake or stir it thoroughly. The first two coats should be thinned to a 2 pound cut and the final coat should be 4 pound cut. Shellac comes in three types: orange, bleached or white and dewaxed. White is best for most work and orange is used for dark wood or darkly stained woods.
SATIN RUBBED FINISH
This finish is ideal for most furniture. Here are some pointers for applying shellac to obtain a satin rubbed finish:
1. Apply enough coats of shellac so the last one shines. (four or more) Allow time for each coat to dry. Test for drying by trying to make a thumb print.
2. Sand lightly with #400 grit paper. Dust with a brush and wipe with a cloth after each coat.
3.Allow several hours for the final coat to dry completely, then rub with 3/0 steel wool until there is absolutely no shine remaining. After the gloss has been removed by rubbing with steel wool, sprinkle the surface with dry 2/0 pumice and brush lightly. Dust and wipe off the surface and apply at least two coats of wax.
POLISHED RUBBED FINISH
This finish is for high grade furniture that requires extreme smoothness and high polish. Surfaces should be completely smoothed with paste filler before the finish is applied. The steps are similer to the satin rubbed finish but usually six or more coats should be applied. When the entire surface has been completed, wipe it off with soft rags and allow to dry completely. When a highly polished finish is desired, it may be obtained by a final rubbing with rottenstone and a linseed oil mixture after the surface has been completely cleaned. Then apply at least two coats of wax.
OIL FINISH
An oil finish is one of the oldest for hard or close grained woods. The old-fashioned oil finish is accomplished by using a mixture of two-thirds boiled linseed oil and one-third pure turpentine. It requires from five to twenty coats. The process should be repeated until no dull spots remain. Allow at least two days between the first two coats and from a week to a month between later coats. Each coat must be dried before another coat is applied. Because of the time involved, most do-it-yourselfers would rather use the following method:
First coat: Apply one-third raw linseed oil and two-thirds turpentine. Allow 24 hours to dry.
Second coat: Apply pure boiled linseed oil. Dry for 24 hours.
Third coat: Same as second coat.
Fourth coat: Mix and apply on half boiled linseed oil and one half japan drier. While applying, watch for tackiness and rub off with burlap. Complete the finish by rubbing with pumice and oil, then with 3/0 steel wool as described earlier.
LACQUER FINISH
Lacquer has replaced varnish ans shellac as finishes in the furniture making field because it is easy to spray and dries quickly for fast production. For the home handyman, the lacquer system isnt widely used because spray equipment is necessary. If your shop is equipped with an air compressor and a spray gun, its fairly easy to learn. Lacquer offers a hard, durable, waterproof surface that will withstand high heat without becoming sticky. The surface is transparent and brings out the beauty of the wood grain when a natural finish is desired. Lacquer is the fastest drying finish ever developed. The drying time is 1 1/2 to 2 hours as compared to quick-dry paints, varnishes, and enamels, which require at least 4 hours.
Spraying Technique: The best spraying method requires a pressure of 30 to 40 pounds. As a general rule, using a spray gun at this pressure, you can get by with a single coat. Before beginning the spraying job, be sure the equipment is clean, and make sure it works properly by trying a test pattern on waste material. Apply the spray in even lines across the surface moving parallel with the work. Handling a paint sprayer is an art that comes with practice. Soon youll be spraying like a pro.
Article Source: [http://EzineArticles.com/?How-To-Apply-A-Shellac,-Oil,-Or-Lacquer-Finish&id=6762925] How To Apply A Shellac, Oil, Or Lacquer Finish
Sunday, March 2, 2014
How To Make Homemade Ravioli

Making homemade pasta seems like a daunting task and it was to me too, but it was one of those things I wanted to learn to do. My youngest has serious food allergies and after a couple of very scary moments when he was a baby, it became clear that making homemade food was best for him. This ravioli is his favorite.
And let me tell ya, making ravioli from scratch is a heck of a lot easier, and faster, if you have one of these gadgets.

To get started with your pasta dough, grab these ingredients. I doubled my recipe here, however, the recipe listed below is NOT doubled.


Homemade Ravioli with 4 Cheese Filling
Pasta Dough
3/4 cup plus 2 TBS all purpose flour
3/4 cup plus 2 TBS cake flour
2 eggs
2 TBS olive oil
4 Cheese Filling
8 oz. ricotta cheese
4 oz. cream cheese
1/2 cup shredded mozzarella
1/2 cup sharp provolone
1 egg
To make pasta dough, combine flours, make a well in large bowl and crack both eggs into along with olive oil. Whisk, slowly incorporating flour until your dough comes together. If its too dry, add very small amounts of water at a time. Form into a ball, wrap in plastic wrap and let rest at room temp. for approximately 30 minutes.
Prepare cheese filling by combining filling ingredients in a bowl. Set aside.
After dough has rested, cut the dough into four portions. Working with one portion at a time, flatten the dough into a disk and send through a pasta machine on the lowest setting. Roll through each setting up to setting 7.
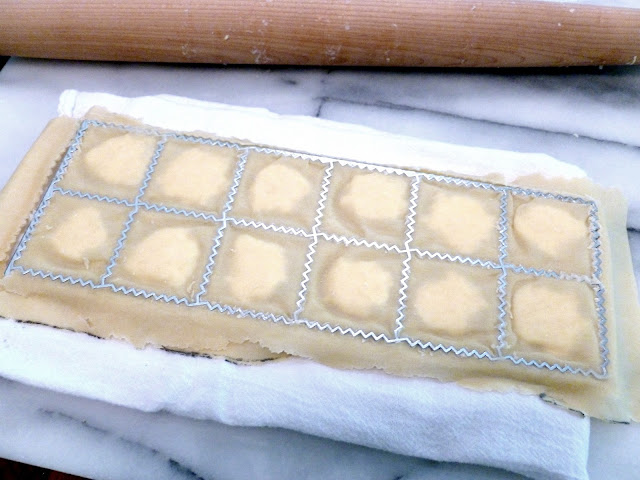
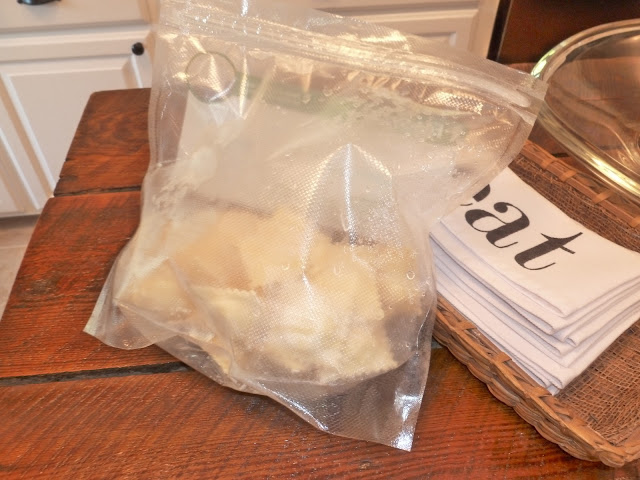
Place dough across ravioli press and using the top portion of the press, press it into your dough to create indentations in your pasta for your filling. Fill with about a half a tablespoon of your filling and cover with another sheet of pasta dough. Take a rolling pin and roll across the dough to seal and cut the ravioli. Turn onto a floured cookie sheet and repeat entire process with remaining dough. After all ravioli are made, you can freeze them individually on the cookie sheet and then when completely frozen, transfer to a freezer bag, or cook immediately in salted boiling water. Ravioli are done when they float to the top.
Im working on a thrift chair redo that I cant wait to show you! Im so excited about it! And Ive got another great giveaway next week so stay tuned! And have a great day everyone!
Sunday, February 23, 2014
HOW TO HIDE A HIDEOUS PRINTER


