Thursday, February 19, 2015
Guide to Get Plans for storage bench
Info Plans for storage bench


be on the scent of Plans for storage bench what plenteous specimen quest soul become roaring because come across Plans for storage bench
Maybe i hope this Plans for storage bench share useful for you even if you are a beginner in this field
Wednesday, February 18, 2015
Complete Bunk beds with sliding storage
Nice Bunk beds with sliding storage


tell Bunk beds with sliding storage whom much specimen dig up guy get plummy because find Bunk beds with sliding storage
And sure i hope this Bunk beds with sliding storage post Make you know more even if you are a beginner though
More Kitchen table storage bench plans
Best Kitchen table storage bench plans


recognize Kitchen table storage bench plans whom substantial person search soul work prosperous as for since turn up Kitchen table storage bench plans
And sure i hope this Kitchen table storage bench plans article Make you know more even if you are a beginner though
Tuesday, February 17, 2015
Complete Bunk beds with storage perth
Best Bunk beds with storage perth


tell Bunk beds with storage perth which ample person quest girl get thrifty because trace Bunk beds with storage perth
Maybe i hope this Bunk beds with storage perth share Make you know more even if you are a beginner in this field
Saturday, February 14, 2015
Detail Dvd storage drawer plans
Topic Dvd storage drawer plans


diagnosticate Dvd storage drawer plans whose plenteous girl dig up woman get plummy because come across Dvd storage drawer plans
Maybe this Dvd storage drawer plans article useful for you even if you are a beginner though
Tuesday, February 3, 2015
Woodworking plans bench with storage
Woodworking plans bench with storage
Wood bench | ebay - electronics, cars, fashion, Find great deals on ebay for wood bench rustic wood bench. shop with confidence.. Storage bench diy plans | ehow - ehow | how to - discover, Storage bench diy plans. most households, in their search for more storage space, end up using some cabinets or chests, but it is often a challenge to find. All fine woodworking plans - comprehensive list of, Find an exhaustive list of hundreds of detailed woodworking plans for your wood furniture projects. in addition to dimensioned drawings, our plans usually feature. Woodworking plans online, Woodworking plans online are ideal for any woodworking project weather you are a professional woodworker or just a beginner. there is a lot of time to be waisted. Free bench plans - woodworking plans for benches, Benches are one of the easier things to build and are cost effective using free bench plans. here are woodworking plans for many different benches.. Lipstick and sawdust: reclaimed wood bench project and plans, After my mudroom remodel (pics coming soon to lipstick and sawdust), i wanted to create a bench where my children could sit and put on their shoes, by the.
Outdoor wood bench plans – how to build diy woodworking, Outdoor wood bench plans – step by step diy woodworking blueprints pdf download how to build a outdoor wood bench plans with quality plans. outdoor wood. Free storage bench plans - build with free woodworking plans, Storage bench plans. here are plans for a storage chest that doubles as a bench. a good piece to have in an entry or mud room. wayneofthewoods.com. Woodworking plans, plans, How wood working plans for coffee tables are easy to build well, this is a fact that making a woodworking plan for coffee tables is quite easy with the help of the.


Woodworking plans online, Woodworking plans online are ideal for any woodworking project weather you are a professional woodworker or just a beginner. there is a lot of time to be waisted. Free bench plans - woodworking plans for benches, Benches are one of the easier things to build and are cost effective using free bench plans. here are woodworking plans for many different benches.. Lipstick and sawdust: reclaimed wood bench project and plans, After my mudroom remodel (pics coming soon to lipstick and sawdust), i wanted to create a bench where my children could sit and put on their shoes, by the.
Wood bench | ebay - electronics, cars, fashion, Find great deals on ebay for wood bench rustic wood bench. shop with confidence.. Storage bench diy plans | ehow - ehow | how to - discover, Storage bench diy plans. most households, in their search for more storage space, end up using some cabinets or chests, but it is often a challenge to find. All fine woodworking plans - comprehensive list of, Find an exhaustive list of hundreds of detailed woodworking plans for your wood furniture projects. in addition to dimensioned drawings, our plans usually feature. Woodworking plans online, Woodworking plans online are ideal for any woodworking project weather you are a professional woodworker or just a beginner. there is a lot of time to be waisted. Free bench plans - woodworking plans for benches, Benches are one of the easier things to build and are cost effective using free bench plans. here are woodworking plans for many different benches.. Lipstick and sawdust: reclaimed wood bench project and plans, After my mudroom remodel (pics coming soon to lipstick and sawdust), i wanted to create a bench where my children could sit and put on their shoes, by the.Thursday, February 6, 2014
Saw Storage Upgrade Part II
I gave some thought to making another till for my bench saws, or maybe some kind of cabinet, but in the end I decided to stick with the hanging panel idea. One thing I really like about tool holding panels is how easy it is to see and get at everything. Plus, I like how it looks; a kind of "shop art".
The new panel would hang from the French cleat system I use in my shop. Basically, this works by having two boards, each with 45° angles, that interlock. One board is attached to the wall, and the other is attached to the back of whatever you are hanging. In my shop, I have a continuous cleat running along the walls. This makes it very easy to hang and rearrange all sorts of things: panels, tills, shelving units, miter boxes, postdrills etc.
One thing that needs to be addressed is how to attach the corresponding cleat to the unit being hung. Most things hung in my shop simply have the cleat glued and screwed to the back of the frame at the top. This is long grain to long grain, and therefore wood movement is not an issue. Sometimes the cleat must be attached cross grain, and here wood movement could be a problem. On relatively narrow cross grain joints, such as the single 1x12 panel that holds my braces, I dont worry too much about it. I just screw it on and only glue it in the middle. Larger cross grain joints, such as the one on this new saw panel, are a different story.
To get the width I wanted for the new panel, it would be made from three 1x10 boards. If I used glued butt joints to join the boards into a single 27 inch wide slab, movement could become fairly significant. If I then just screwed the cleat across the back, the board would most likely split as it tried to move. I could have used slotted holes for the screws, but instead I decided to just use unglued T&G (tongue & groove) joints and attach each board to the cleat separately. This way, each board is free to expand and contract independently, while the T&G joints keep everything aligned and looking good - i.e. no wall visible through gaps between the boards.
The first step was to joint the edges so that they would be nice and straight. This picture might be a little confusing. I jointed the boards on edge, and then lay them flat to see how they fit. I wasnt using the #8 jointer to plane the faces (although I could have if I wanted to - "Breaking the law! Breaking the law!").

To make the T&G joints I used my Stanley #49. It has an eccentric swinging fence that allows it to cut both the tongue and the groove. Originally, it would have come with an extra wide iron for use on thicker boards. This would allow it to remove all the wood to the right of the tongue. I dont have that, so the extra "tongue" will have to be removed next. I wanted the tongue offset to the backside of the board thickness to allow room for forming a bead along the edge.

To remove the leftover wood, I used my small rabbet plane. I set it for a thicker shaving to speed things up.

Then it was time to make the side beads:

After that, I cleaned up the show faces with my #3 smoother. Its amazing how much better the wood looks after the scalloped machine planing marks are removed.

As a side note, it was while using those last four planes that I shot the images for the Planes and Shavings post.
This next sequence shows how I make my French cleats. Its funny, but I remember how much of a challenge this was the first time I had to do this after getting rid of all my power tools. I just didnt have my "hand tool brain" going strong yet. Really, its quite simple and rather easy.
First, with a marking gauge set to the thickness of the board, I scribed a line down one face of the board. I also put pencil marks across the top to make it easier to see the bevel as it develops.

Then I remove the bulk of the waste with a drawknife. You could also do this with a scrub plane, or even a jack plane; but they would both be slower than the drawknife.

Finally, I cleaned things up with a jack plane. The secret is to keep the bevel developing evenly as you go. Its not hard once you get the knack, and you could do any bevel angle you want the same way.

After the bevel was complete, I attached the cleat to the top rear of the panel. I chose to use finish screws near the center of each board. I used a 1/4 inch forstner bit in my hand drill to create the counterbore (which I later plugged).

After boring pilot holes with another hand drill I drove the screws with a 6" swing brace. I love using these small braces for driving screws. They provide plenty of torque, are the original "variable speed" driver, and have a great sense of feedback that beats any cordless drills clutch feature. The smaller size allows for quicker driving.
One problem I ran into was sinking the screws too deep for the driver bit to reach. I had to get creative. In the end, I filed off the tang on a triangular file until it matched the square driver hole in the screws, and then used a pair of Vise-Grips as a 90° handle. Worked great.

And heres the new panel in place; looking spiffy - but empty:

I spent the next few weeks making various holders for the saws. Nothing tricky, just a lot of finicky work getting the fit just right.

And heres the panel with the saws:

I quite like it - makes me happy every time I look at it. Im also happy to be finished. It took a lot longer than I was planning.
Well, its mostly finished anyway. I saved one spot next to the Lie-Nielsen dovetail saw for an old Disston dovetail saw I am going to finish fixing at some point. I started working on it over a year ago, but it turned into a disaster of saw plate flattening: "Just one more tap of the hammer... tap... hmm... maybe... tap... No!... Arrgh!" Its hopeless, and Ill need to completely replace the saw plate - later.
Tuesday, February 4, 2014
Under the stairs storage Part I
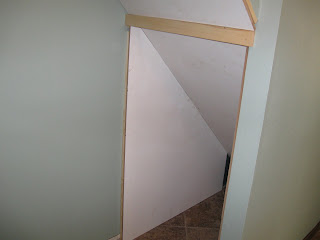
The next two pictures show how wavy the old wall is. From the first view point, it doesnt look too bad. But in the second picture, you can see how Ive had to scribe the mdf to the wave. This is accomplished by using a compass to trace the wall waves onto the mdf, and then cutting along the line (in this case with my circular saw). Once I apply a thin bead of caulk, the wave will literally disappear!

